
This post may contain affiliate links. See the full disclosure here.

Bath bombs are a great addition to your bath and they're fun to make as well. I always feel like a kid in the sandbox. You remember - trying to lift that sandcastle mold very slowly so it doesn't break.
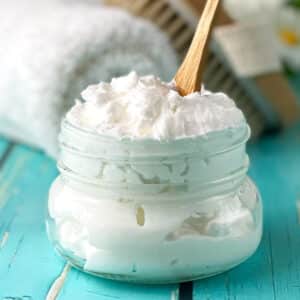
I came up with this project while thinking of our beach vacations and how much I missed the ocean.
The smell of these is amazing. Just like the ocean breeze. The dead sea salt makes them super soothing for your skin.
Sick of winter? You've gotta try these 🙂
Tips on making bath bombs
I've written a whole guide on how to make bath bombs , if you want to check it out. Here are some main pointers.
- Weather: Don’t attempt to make bath bombs on a day where the humidity is very high or if it has rained for several days. The water in the air may trigger the fizzing reaction in your bowl before you get to mold them. They might also cave in, not hold their shape properly, display "warts" or turn out super crumbly.
- Consistency: Put some of the mixture in your hand, make a fist and if the mixture stays together try to mold it. It's better to add witch hazel little by little instead of ending up with a mixture that's too wet.
- To unmold: Slightly tap top half with your fingertips or a spoon, then try to lift the mold off in a twisting motion. I like to let the bath bomb sit in the bottom half over night once I make sure the two halves are firmly glued together.
A word on using food coloring in bath bombs
Simply put: Don't do it. You might get away with it but the result will likely be disappointing. I gave food coloring a shot in the video below and the results were meh. Food coloring contains water which will offset the fizzing reaction as you're mixing it in. Your bath bomb will turn out more crumbly and you will have more trouble keeping the two halves together (see in video). Do yourself a favor and use a colorant that's meant to be used for bath bombs - micas and clays work great as well.
Watch me make them here:
Let's start started:
Ingredients:
- 1 cup baking soda
- ½ cup citric acid
- ¼ cup dead sea salt
- 1,5 ml Sea Salt fragrance oil (or you can use a fragrance or essential oil of your choice, please check the usage rate)
- about 5 drops of blue bath bomb colorant. I like this one.
- Witch hazel (for spritzing)
- Coarse Himalayan sea salt (to garnish)
Equipment:
- Bath bomb molds
- A large bowl for mixing
- A spray bottle
Instructions:
- In a large bowl mix all your ingredients together using a whisk or your hands to work out all the clumps
- Put the witch hazel in a spray bottle and give a couple of spritzes
- Test your mixture: put some in your hand, make a fist and see if it holds it’s shape
- If not, add a little more witch hazel - but not too much
- Test again
- If your mix holds its shape, fill one half of your mold up just to the brim
- Fill the other one a tiny bit fuller
- Squeeze them both together for 10 seconds
- To release from the mold gently tap upper half with a spoon, twist and gently pull up
- Let sit and harden in the other half
- After they fully harden package them to make sure no moisture can get in
- Enjoy!
Until next time. Happy Tinkering!


Deborah Joiner says
Love these. Good Luck on your blog. I am anxious to see your future projects.. Our craft group is always looking for things to make when we meet.
If I can help you or offer any appropriate links, my blog is http://thecharmlover.com.
Celine says
Thank you so much Deborah! I have lots more projects cooking. That's so cool that you have a craft group.
Jennifer Robin says
Its not sticking together cuz your pushing the mix down to hard an also not filling each side high enough your not supposed to push your mix down that hard You want to leave it loose and you want to over fill each side of your bath bomb mold
Jennifer Robin says
But I do want to say omg girl I do love the way they loom love those colors