


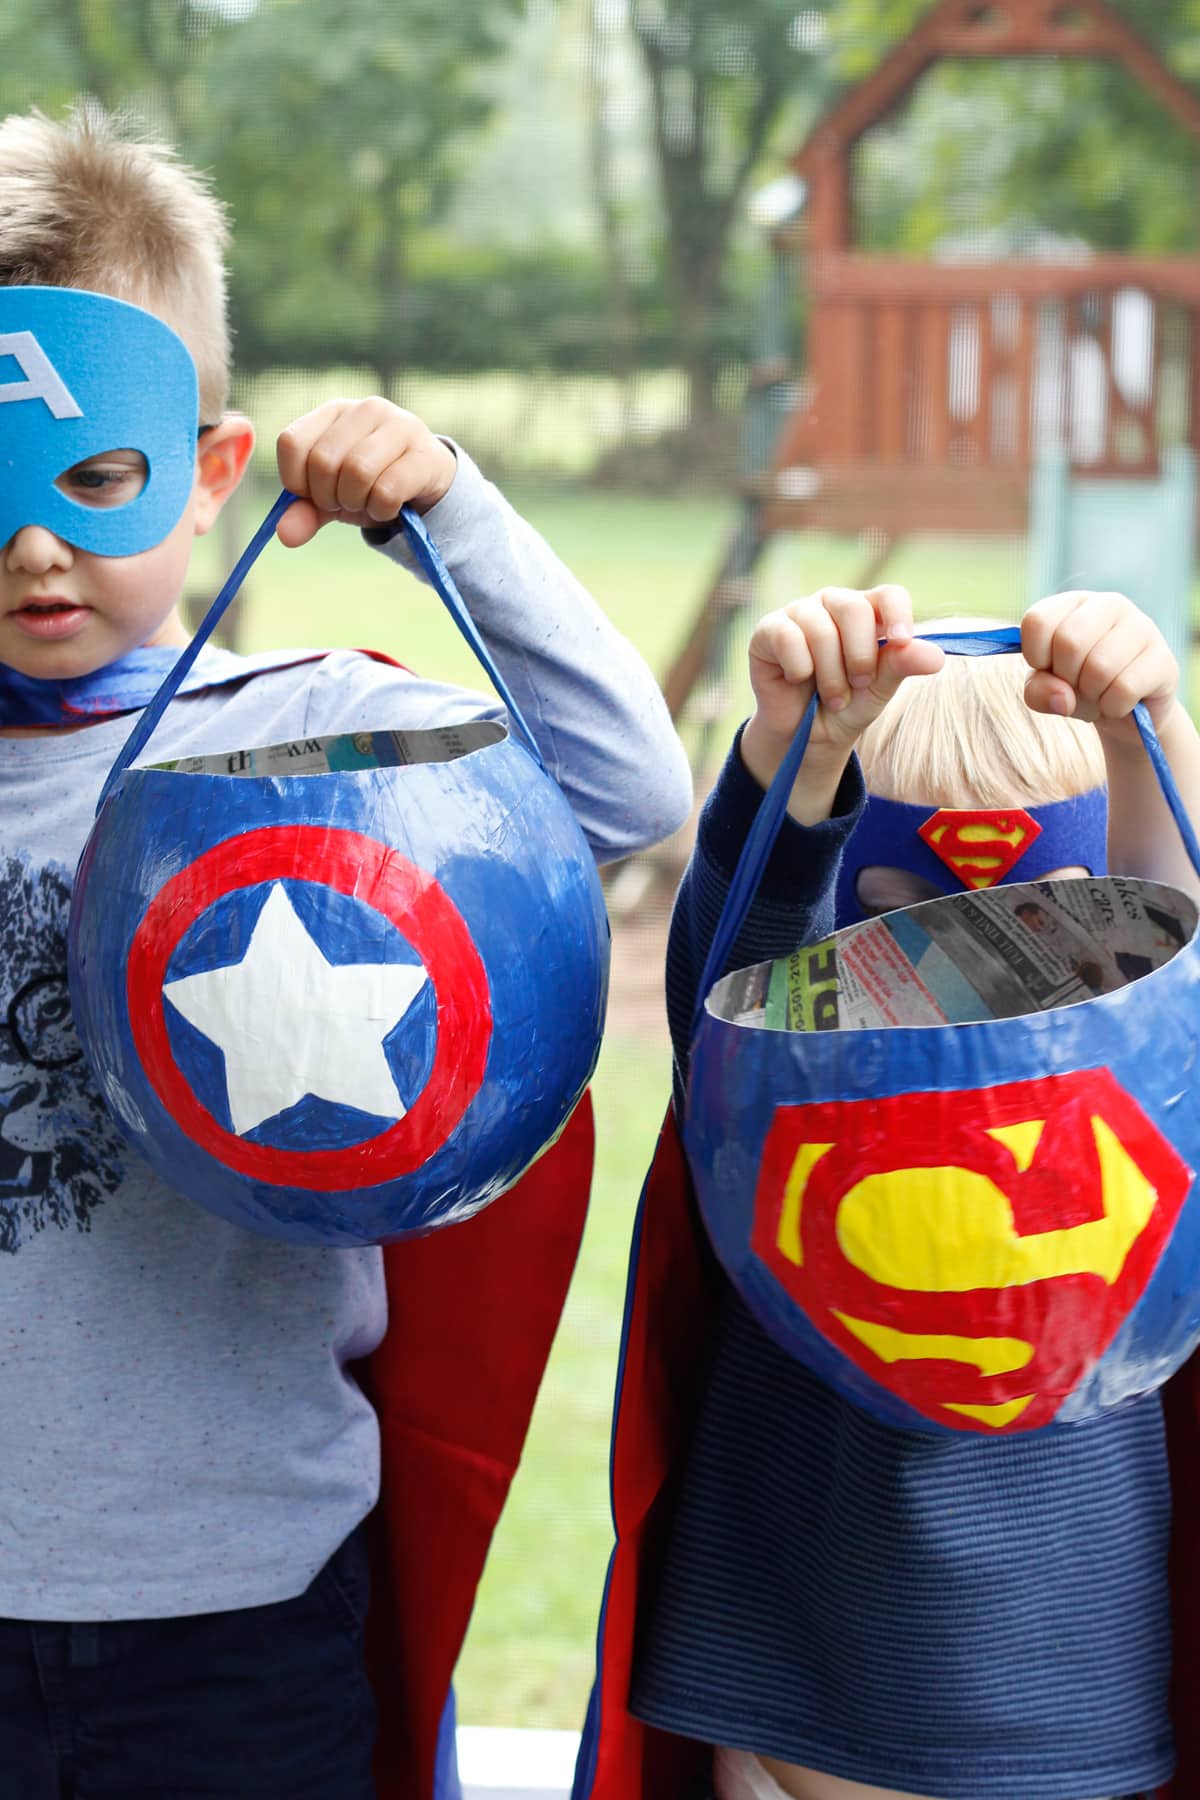
These DIY Halloween baskets are made using lightweight paper mache perfect for little ones to hold and are easily customizable to your child's costume. They will add a special touch to any Halloween costume and kids love to show them off.

The other day I was looking through old photos and remembered that I used to make these handmade treat baskets for the kids. I guess that was before I had 3 kids and still some time? Anyway, they came out so cute, the kids loved them and they added that little extra touch to their costumes.
See also: DIY Jack o Lantern Halloween Bath Bombs
What You'll Need
- White Elmers Glue - you can use clear glue, but make the glue-water ratio 3:1
- Water
- Small bowl
- Balloon - a regular sized balloon is usually big enough for kids
- Heavy-duty paper clip or clothespin (optional)
- Tall takeout container or vase (optional)
- Newspaper strips
- Printer paper strips (optional)
- Acrylic paint - you don't want to use watercolor, it will make the paper mache soggy
- Scissors
- Rope, thick string or ribbon
- Hole punch

How to Make Papier Mache Baskets Using Balloon


- Inflate Balloon: Think about how big you want your basket to be, may hold it next to your child for reference, and blow your balloon up to that size.
- Secure Balloon: this isn't a necessary step, but it makes working a lot easier. Secure the tip of your balloon with a heavy-duty paper clip or clothespin to give it some weight and place it clip down into a tall container.
- Create Glue Mixture: In a small bowl mix together 2 parts of glue with 1 part water.
- Soak Paper Strips: Briefly dip newspaper strips in glue mixture, gently remove excess glue by running the paper strip between two fingers, and place it flat on top of the balloon.
- Repeat and place paper strips so that they're slightly overlapping. Continue until the balloon is covered in 3 layers of paper strips. I like to use printing paper as the last layer which makes the paint stand out more later on.
- Let dry and fully harden
- Design: Now it's your time to get creative. (If you don't mind coloring upside down, I would leave the balloon set up the way it is for best results.) Using a pencil draw the outline of your design on the basket and color it in using acrylic paint.
- Let paint dry
- Pop the balloon and gently peel it off the paper mache wall.
- If you wish you can now paint the inside of the basket as well.
- Using a scissor clean up and even out the opening of the basket.
- Punch holes into the sides and attach a cord or ribbon as a handle.
Leave a Reply