
I didn't grow up celebrating Halloween, but after moving to the U.S. and especially after having kids, Halloween has become a major holiday in our household. This year we started pestering our 4-year-old in the middle of August about what he wanted his costume to be. He just gave us this sideways look and said: "uh, no idea."
Around this time of year I also always find myself coming up with a bunch of crafty projects. In recent year's I've made papier mache trick-or-treat baskets matching the kid's costumes - Fun! I've also toyed with the idea of somehow sewing their costumes myself, but at this point in my life it would probably only lead to a lot of frustration and grumpiness on my part.
But what I definitely wanted to do this year was to come up with a fun Halloween inspired project for you to make. And, here it is: Jack-o'-Lantern Bath Bombs 🙂
These will be sure to delight your kids, and maybe they'll even want to make some themselves.

Let's get started:
This post may contain affiliate links, meaning at no additional costs to you, will I earn a commission if you decide to click through and make a purchase. You can read my full disclosure here.
What you need:
- plastic ornament bath bomb molds - For this project I chose to use this kind of mold for three reasons: a) they can be used for packaging your bath bomb and since the design is a little prone to smudging this is a great option b) you can thread a cute ribbon through and, voilá, have a handmade gift for someone and c) I've made bath bombs with these in humid weather and after sitting in the mold for 24 hours they came out fine since the seal is strong enough to protect them from the humidity.
- spray bottle
- very small paint brush with quite sturdy bristles
Recipe (makes around 8-9 bath bombs):
- baking soda: 2 cups
- citric acid : 1 cup
- cornstarch: ½ cup
- kaolin clay: 5 Tbsp
- sweet almond oil: 2 Tbso
- polysorbate 80: 1 Tbsp
- orange magma mica (from stardust micas): 4 tsp
- copper nugget mica (from stardust micas): 1 tsp
- sweet orange essential oil: 30 - 40 drops
- witch hazel
- polyethylene alcohol 99%
Instructions:
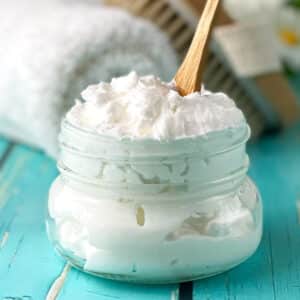
- Add baking soda, citric acid, cornstarch, kaolin clay and orange mica into a large mixing bowl and combine thoroughly by whisking with a whisk first and then working all remaining clumps out with your hands
- Add polysorbate 80, sweet orange essential oil and sweet almond oil to the mix and combine everything using a whisk
- Your mixture should now be wet enough to start holding its shape, check by making a fist and squeezing the mixture together
- If it falls apart when you open your fist, spritz the mixture with witch hazel, checking the consistency frequently (you can see a video of this step here so you can see what the consistency should be like)
- Now you can start packing the mixture into the mold, pack it in pretty firm on the bottom of each half and loosely heap the mixture on top, so that the two halves firmly stick together after you remove the mold
- Make sure that the inside ring of the mold is clear of mixture so that the two halves can interlock together
- Now holding by the rim of the mold press both sides together until you hear the halves interlocking
- Let the bath bombs sit in the mold for 24 hours
- Gently open the mold by running your fingers through the groove between the two halves
- Sometimes you have to coax the bath bomb out of there - I usually use a small pairing knife to give it a little nudge
- Mix 1 teaspoon of copper nugget mica and 1 ½ teaspoon of isopropyl alcohol together to make the "paint"
- Dip your small paint brush into the mix, whipping it on the edge of your container to get rid of any excess (the consistency of your "paint" shouldn't be too runny nor too dry and clumpy, you might have to add more alcohol as you go along since it quickly evaporates)
- start painting on the jack-o'-lantern face, you can use your imagination or use my example for that

14. Let dry for at least 30 minutes - Avoid touching the paint or you will smudge it!
15. You can repackage your bath bomb back into the ornament mold taking care not smudge the jack-o'-lantern face
If you decide to make these, I would love to see! Tag your projects on Instagram with #tweakandtinker.
Until next time. Happy Tinkering!


Leave a Reply