


Make your own DIY loofah soap using an easy melt and pour soap base in only 10 minutes! Loofah soap bars are perfect for exfoliating dry skin and make great gifts.

Handmade Soap Using Loofah Slices
I don't know about you, but coming out of winter, my elbows, knees, and feet need some serious exfoliating. To say that they're slightly dry would be an understatement-handmade loofah soap to the rescue.
Making your own loofah soap on a rope is such a fun and easy DIY craft project. The finished soaps look super pretty with the loofah inside. Better yet, you can hang them to dry, making them last longer. It's a great way to add this natural product to handmade soap, and it will benefit your skin.
For this soap-making project, I used whole loofah sponges that already came on a string (win!), goat milk melts and pour base and a blend of relaxing and refreshing essential oils.
Benefits of Loofah Soap
The fibrous, scrubby texture of loofah is perfect for gentle exfoliation. Exfoliating your skin regularly is essential to keep your skin glowing and healthy. When the scaly outermost layer of the skin is removed, things like creams, lotions and body butter are absorbed much better.
Adding loofah pieces to this melt-and-pour soap recipe was really a no-brainer because that way, you get cleansing and exfoliation at the same time. What's not to love?
Disclaimer: This post contains affiliate links, you can find my full disclosure here.
Ingredients
- 1 lb melt and pour soap base: I used a goat milk soap base, which has great skin benefits, you could use a clear soap base as well to make the loofah inside more visible.
- 4 slices of natural loofah sponges: the sponges I used came with a cotton string threaded through the sponge, which gives the soap a great "soap on a rope" look
- 24 drops of essential oils (optional): I like the combination of lavender and lemon essential oils. Geranium, mint, ylang ylang, and sweet orange would also be a good choice.
- 20 drops of purple soap colorant (optional): I like that these colors are premixed and ready to go, you could use mica powder as well.
Equipment
- bread knife
- heat-resistant glass measuring cup
- silicone spatula
- round silicone soap mold
How to Make Loofah Soap


- Gather your supplies
- Cut loofah into ¾-inch thick slices - I used the rope portion of each loofah, but if yours doesn't come with one, you can add your own string or simply leave it out
- Place in the mold - center each slice string side up
- Even out loofah - slices should be even with mold if not you can use a scissor to even them out
- Cut the soap base into small chunks
- Add soap to a glass bowl
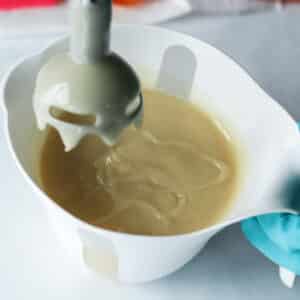
- Melt the soap - in the microwave on 20-second bursts or over a double boiler/water bath stirring frequently until fully melted, don't overheat!
- Add colorant and essential oils, stir
- Pour the soap mixture into the mold
- Let cool and harden for 1-2 hours
- Remove soap from mold
- Store - Wrap each soap in plastic wrap or store in an airtight container, it's important to keep the soap away from humidity as much as possible
What's Loofah aka Luffa?
Before writing this post I had no idea what luffa was or where it came from. I suspect I'm not the only one who doesn't, so let's find out.
The luffa plant is a genus of tropical and subtropical vines in the pumpkin, squash and gourd family. When the loofah fruit is harvested early it is used as a vegetable. When the fruit is fully ripened, it is very fibrous and often used for skin care.
You can actually grow your own luffa to eat or to use in the shower. It's a vegetable that needs a long growing season. So you might want to start your luffa seeds indoors ahead of time.

Looking for more exfoliating DIY recipes? Try my Himalayan salt scrub.

DIY Loofah Soap
A gently exfoliating bar of loofah soap that's quick and easy to make in 10 minutes!
Materials
- loofah slices (with string, optional): 4
- goat milk soap base: 1 lb
- purple liquid soap colorant: 12 drops
- lavender essential oil: 20 drops
- lemon essential oil: 20 drops
Tools
- round silicone soap mold
- serrated knife
- sharp knife
- medium heat-resistant glass measuring cup
- whisk
- silicone spatula
Instructions
- slice loofah into ¾ Inch thick slices just below string using a bread knife
- place each slice in the center of the mold string side up
- slices should be even with mold
- even out loofah slices using a scissor if too high or uneven
- cut melt and pour soap base into small chunks
- place soap base in heat-proof glass measuring cup
- melt in microwave on 30 second burst or over a double boiler / water bath stirring frequently until fully melted
- stir in soap colorant and essential oils
- pour soap mixture into the mold aiming whole in the loofahs
- let soap cool and harden for 2-3 hours
- remove soap from mold
- wrap each soap in plastic wrap or store in an airtight container
Notes
Substitutions:
mold: you could use empty food containers or yoghurt cups that have the right size for your loofah
soap base: clear soap base or shea butter soap base work as well
essential oil: use any fragrance oil of your choice instead


Leave a Reply