

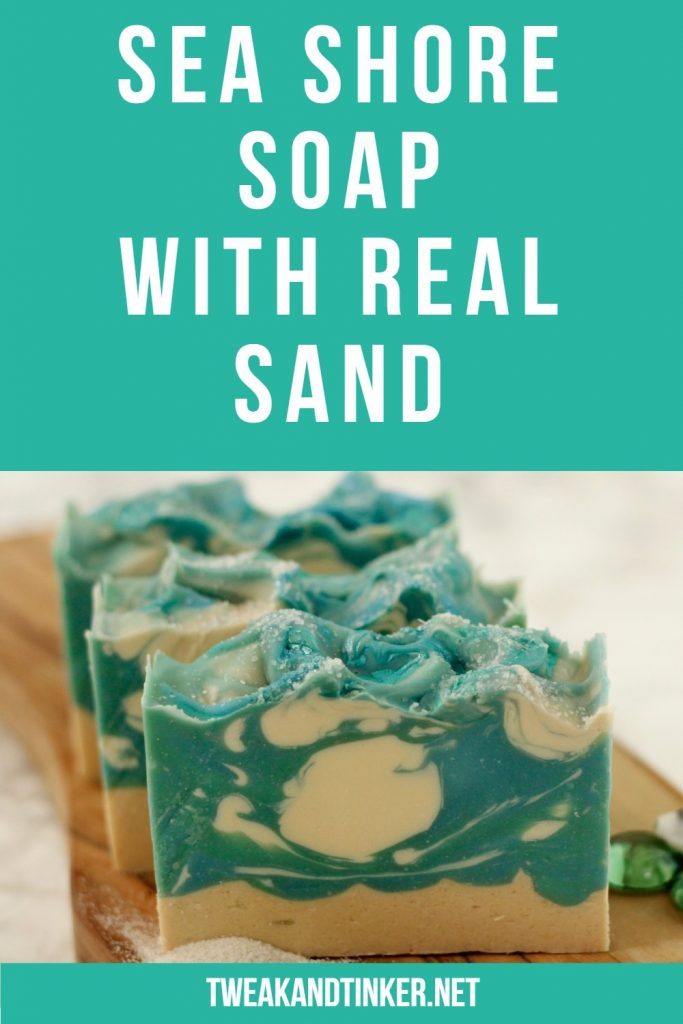
You might've noticed by now that when it comes to soap I like to experiment with new and different types of ingredients. As it happened this time I had this little bottle with pristine white sand that I brought home from Florida sitting on the shelf taunting me to do something with it. Well, into the soap it went.

Now why on earth would you want to put sand in your soap? The short answer: because it's fun. The long answer: because it adds scrubbiness to your bar. As a matter of fact the more "conventional" option to picking up sand from some beach is to purchase pumice powder (which is ground volcanic rock). Pumice powder is commonly used to create soaps that are really scrubby and can be used on the feet, elbows and knees to get rid of stubborn callouses.
I also chose sand for design purposes - I wanted the sandy bits in this soap to have just enough texture to give the illusion of the ocean floor. It looks beautiful and can also be a nice way to pay tribute to a place you've visited or live. If you run a soap store in a beach town, I would imagine soap made with local sand would be a big hit.

Before I used the sand, I boiled it in distilled water for 15 minutes to eliminate the chance of contaminants. Technically, lye does a pretty good job at killing microbes, but better to be safe.
Now, a message on how my soap turned out in hopes that you learn from my mistake: Titanium Dioxide (TD) will thicken up your batter. I don't know why I always, always forget this, but I do (maybe it's a sign that I should stop using TD, but that's another topic ;). So, anyhow, the ocean part of this soap was supposed to be more of a wispy in-the -pot swirl. Instead, the white remained gloppy and the green and blue colors blended together since they were still nice and fluid. You live, you learn.
If you're working with titanium dioxide, mix it in LAST and be prepared to work quickly. I have faith that you will do a much better job than me. If you do, tag me on Instagram #tweakandtinker, so I can see your beautiful creation.

Are you ready to have a little fun with this beachy soap? Let's go!
If you've never made cold process soap before, I highly recommend you read my article on lye safety, equipment needed and my beginner tutorial.
Disclaimer: This post contains affiliate links, meaning at no additional cost to you will I earn a commission if you click through and make a purchase.
Equipment needed:
- Crafter's Choice loaf mold
- 4 medium sized containers (not glass)
- 4 small cups for premixing the colors
- digital kitchen scale
- stick blender
- spatula
- small spoon (for texturing)
Recipe
Makes 7-8 regular sized bars or 42 oz/ 1200 g of soap, the recipe is superfatted at 5% and uses a lye concentration of 38%:
- Distilled Water: 6.8 oz/ 192 g
- Lye: 4.2 oz / 118 g
- Olive Oil (32%): 9.5 oz / 269 g
- Coconut Oil (30%): 8.9 oz / 252 g
- Refined Shea Butter (18%): 5.3 oz / 151 g
- Rice Bran Oil (15%): 4.4 oz/ 126 g
- Castor Oil (5%): 1.5 oz / 42 g
- Fine Sand or Pumice Powder: 2 Tbsp
- Sea Salt Fragrance Oil: 18 g
- Ariel Blue Mica: ⅔ teaspoon dispersed in ⅔ tablespoon of base oils
- Tail Green Mica: ⅔ teaspoon dispersed in ⅔ tablespoon of base oils
- Queens Gold Mica: ½ teaspoon dispersed in ½ tablespoon of base oils
- Titanium Dioxide: 1 ½ teaspoon dispersed in 1 tablespoon of warm water
- Fine Sea Salt to decorate the top


Instructions:
- Gear up for safety: googles, gloves, no kids or pets around
- Carefully stir the lye into the distilled water to create a solution, set aside
- Melt coconut oil and shea butter in a double boiler or in the microwave on 30 second bursts
- Add olive oil, rice bran oil and castor oil to coconut oil and shea butter and set aside to cool
- In a small saucepan add sand and distilled water and boil for 15 minutes, strain through a small mesh sieve and coffee filter (only if your using beach sand)
- Prepare and premix your micas and titanium dioxide in small cups with oil and water (only TD)
- When lye and oils have both cooled to 90 degrees F, carefully pour the lye solution down the shaft of the stick blender into oils
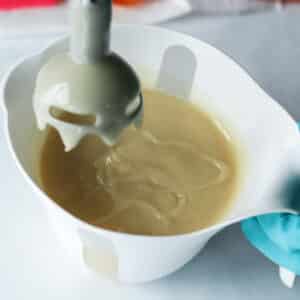
- Stick blend until light trace is achieved
- Pour 10 oz (280 g) of soap into a separate container
- To this portion add the gold sparkle mica and a little bit of TD until you have the desired sand color
- Add 6 g of Sea Salt fragrance oil
- Stick blend only this portion until thick trace is achieved
- Stir in by hand 2 tablespoon of sand or pumice powder
- Pour the sand portion into the mold and with a small spoon to make it look like little sand hills
- Set the mold aside
- Add the rest of the fragrance oil 12g to the remaining soap batter
- Pour of two portions each 8 oz (220g) and color one with Ariel Blue mica and the other with Tail Green mica (leave a little bit of each mica in the cup to sprinkle on the top) by stirring in the color with a spatula
- Add the titanium dioxide to the third portion and stir with a spatula
- Create an in-the-pot- swirl: Imagine that the container of the white soap is a clock, now pour the blue soap from up high in "12" and "6" and the green soap in "3" and "9". Since I wasn't so successful on this part, I found a video for you that shows you a proper in-the-pot-swirl 😉
- Drag your spatula once through all 4 spots and fill the mold with all the batter you have left
- Give the mold a good tap on the counter to get rid of air bubbles
- Drizzle a little bit of the remaining green and blue mica over the top
- Create a wave like texture using a small spoon
- Decorate the top buy sprinkling fine sea salt where the waves are highest to give the illusion of foam (?)
- Insulate the mold with a thick towel
- After 24 - 36 hours cut into bars
- Cure for 4 weeks
Until next time. Happy Tinkering!


Kalen says
Can I do this without the titanium dioxide? Or does it need it?
Celine says
Hi Kalen,
yes you can, but your batter won't be as white.