
This tallow soap is made with beef tallow, babassu, olive, and castor oil. It's a great palm and coconut oil-free recipe, and the soap is gentle and lathers up beautifully.
Coconut and palm oil are both hard oils that soap makers rely on to make a bar of soap harder and give it more bubble power. It is possible, however, to make your own soap without using these two oils. Today, I will share my favorite coconut and palm oil-free recipe with you. It makes such a nice bar of homemade soap that you wouldn't even notice that these two oils have been swapped out.
Disclaimer: This post contains affiliate links, meaning at no additional cost to you will I earn a commission if you click through and make a purchase.
If this is your first time making cold-process soap, please read see how to make soap at home for detailed images.
Recipe
makes about 1 lb of soap. You can easily double or tripple the amount for a bigger batch.
- Distilled water: 3 oz (86 g)
- Lye (Sodium Hydroxide): 1.6 oz. (46 g)
- Tallow (Beef): 4 oz. (113 g)
- Babassu oil : 3 oz. (85 g)
- Olive oil: 4 oz. (113 g)
- Castor oil: 1 oz (28 g)
I'm using a lye concentration of 35% and a superfat of 7%.
Equipment
- Goggles, rubber gloves and a long-sleeved shirt
- Digital kitchen scale
- medium heat-resistant pot (not aluminum)
- two small plastic containers
- immersion/stick blender
- silicone spatula
- silicone soap mold
Instructions
- Gear up for safety! Wear gloves and goggles, wear long sleeves, and ensure kids and pets aren't around. Your skin, eyes, and mouth should never come into contact with lye solution or fresh soap batter. Fumes coming from lye solution should never be inhaled.
- Weigh lye into a small plastic cup using a scale. It's super important that you measure all your ingredients by weight, not by volume.
- Add water to a separate container
- Create a lye water solution by adding lye and stirring until fully dissolved. Don't inhale fumes coming off the lye solution! Set aside to cool.
- Melt tallow and babassu oil over medium heat in a water bath or on short bursts in the microwave
- Add olive and castor oil to melted fats
- Let cool - fats and lye solution should be slightly above room temperature
- Pour the lye solution into the oils - be careful not to splash or spill
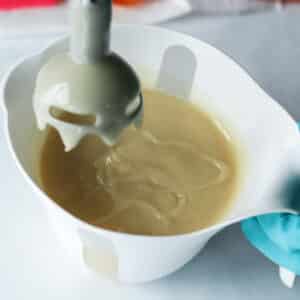
- Stick blend until soap batter is at medium trace (light pudding consistency)
- Pour the soap mixture into the soap mold
- Let rest for 1-2 days
- Unmold bars of soap after 48 hours by pulling on the sides first
- Let soap cure for 4-6 weeks
- Store in an empty shoebox away from heat and humidity for up to 12 months
Until next time. Happy Tinkering!


Pam says
THANK YOU!!! I have an allergy to coconut oil and it is hard to find recipes that do not contain it.
Celine says
You're very welcome. I plan to do more coconut oil free recipes in the future since you guys really seem to appreciate it.
Tasha Williams says
I don't use Pomace. Will it change the construction of the soap if I use Olive Oil instead?
Celine says
Hi Tasha, you can use olive oil instead.