


What could be better on a hot day than an ice cold pineapple popsicles? These sweet treats are dairy-free, gluten-free, filled with fresh fruit, and only lightly sweetened. So refreshing!

Jump to:
Why You'll Love This Recipe
- Easy - all you need is a handful of simple ingredients and a blender
- Versatile and Customizable - add other tropical fruits, adjust the sweetness, or even incorporate additional flavors like coconut flakes or a hint of mint.
- Healthy - your kids won't even suspect that there's fresh fruit in these
Ingredients

- Pineapple - a fresh, ripe pineapple will give you the best flavor, but you can use canned pineapple without added sugar if that's what you have. How to pick a good pineapple: a) Color: A ripe pineapple will have a golden color. Avoid pineapples that are mostly green or have dark spots, those might be underripe or overripe. b) Firmness: It should give slightly when pressed but still feel firm overall. Avoid pineapples that are overly soft or have a mushy texture, they might be overripe. c) Aroma: A ripe pineapple will have a sweet and fragrant aroma at the base of the fruit. d) Leaves: They should be green and fresh-looking, avoid pineapples with brown or dry leaves e) Size and Weight: a ripe pineapple should feel heavy for its size, indicating that it's filled with juice.
- Coconut Milk - opt for full-fat coconut milk with no added sugar.
- Honey - You can use maple syrup instead for a more subtle sweetness.
- Guar Gum Powder (optional) - will make the texture of your popsicles smoother, less icy, and a lot more satisfying. Guar gum is made from legumes called guar beans. It will bind, thicken, and stabilize any liquid it is mixed in.
You can find guar gum at your local health food store or online.
See the recipe card for quantities.
Instructions

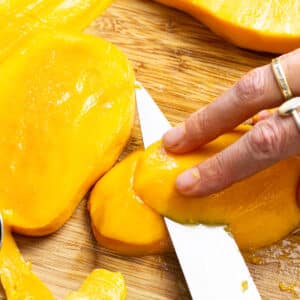
- Start by peeling and coring the pineapple. Cut it into smaller pieces so that it fits easily into the blender. Remember to remove any tough or fibrous parts of the pineapple before blending.

- In a blender, add the cut pineapple, canned coconut milk, freshly squeezed lime juice, and 2 tablespoon of honey to start. Blend until the mixture is smooth and well combined, ensuring there are no lumps or chunks remaining.

- Taste the mixture and adjust the sweetness to your liking by adding more honey if desired. Keep in mind that the sweetness of the popsicles will be slightly muted once frozen, so it's best to have a slightly sweeter mixture at this stage.

- Carefully pour the pineapple mixture into each popsicle form, leaving a small gap at the top to allow for expansion during freezing. This will prevent any overflow or mess when inserting the popsicle sticks later on.

- Place a popsicle stick in each popsicle
- Freeze for at least 6 hours.

- To easily remove the popsicles from the molds, briefly run hot water over the outside. This will help loosen the popsicles and make them easier to slide out without any breakage or mess.
Hint: for mess-free popsicles look for molds that come with a little ledge, or are pop-up style (see equipment section below).
Variations
Here are some ideas to inspire your own variations:
- Tropical Fruits: Add chunks of other tropical fruits like mango, papaya, or passion fruit to the popsicle molds before pouring in the mixture.
- Layers: Pouring the pineapple popsicle mix halfway into the mold, freezing it partially, and then adding a layer of pure coconut milk before freezing it again. Repeat the process until the molds are filled.
- Strawberry Pineapple Popsicles: you can replace up to half of the pineapple in this recipe with fresh strawberries
- Extra Lime Kick: increase the amount of lime juice or zest in the popsicle mixture.
Disclaimer: This post contains affiliate links, you can find my full disclosure here.
Equipment
For this recipe I recommend using a high-speed blender for extra smooth and creamy popsicles. You could also try using a food processor if you don't have a blender.
Although a proper popsicle mold isn't required to make this recipe and can be replaced by small paper cups or ice cube trays. I find that classic popsicle or silicone molds are easier to handle, clean, and reuse. Here are some options I like to use.
Storage
When stored in the freezer these popsicles will keep fresh for 6 -8 weeks.
Related
Looking for other recipes like this? Try these:


Pineapple Popsicle Recipe
Refreshing tropical homemade popsicles with fresh pineapple, coconut milk, and lime juice. Perfect for hot summer days!
Ingredients
- fresh pineapple chunks: 4 cups / 24 oz
- juice of 1 lime: ¼ cup
- 1 can of coconut milk (full fat, unsweetened)
- honey: up to ¼ cup
- guar gum powder (optional): 2 tsp
Instructions
- Peel, core and cut pineapple into chunks, add to blender
- Squeeze lime juice into blender
- Add coconut milk
- Add 2 tablespoon of honey to start
- Blend ingredients until well combined and no chunks or bits remain
- Taste for sweetness and add more honey if desired, blend again
- Carefully pour mixture into popsicle molds
- Gently tap down to release any air bubbles
- Place popsicle stick into each one (if using)
- Freeze for at least 6 hours (preferably overnight)
- To release from mold run under some warm water to loosen
Nutrition Information:
Yield: 12 Serving Size: 1Amount Per Serving: Calories: 31Total Fat: 0gSaturated Fat: 0gTrans Fat: 0gUnsaturated Fat: 0gCholesterol: 0mgSodium: 4mgCarbohydrates: 8gFiber: 1gSugar: 6gProtein: 0g


Leave a Reply